Why Does Solids Appear in 3ds Max Revit Art Render
How to render interiors in 3ds Max
Anyone who works in the worlds of architectural or interior design, and has need for 'creative person renderings' of interior or exterior spaces, will be familiar with 3ds Max, published past industry giant Autodesk.
3ds Max is the default standard bearer for such work, not considering it can't exist washed in other 3D programs - it tin can. But more likely considering 3ds Max is so well integrated into Autodesk'south other architectural and AEC industry packages, such as AutoCAD and Revit, which dominate their respective and related markets.
Creating an interior room in 3D can be approached a number of ways, but it breaks down into the following general steps (regardless of the program y'all apply): modelling, scene building (which predominantly includes texturing and lighting), and rendering the final image, followed (usually) by mail-product.
01. Modelling
This is the stride where we create the room and all of the furniture that goes into it. Merely similar visiting a Hollywood set, people are often surprised when they meet the actual models that make up a 3D analogy. The 'room' is ofttimes a terribly simple 3D geometry - more or less a hollow box, with any needed variations in shape. Button out an 50-shape there for a dining area, knock out holes for windows and doors, peradventure some other hole in the ceiling that will later on have a flight of stairs added beneath it, and so forth.
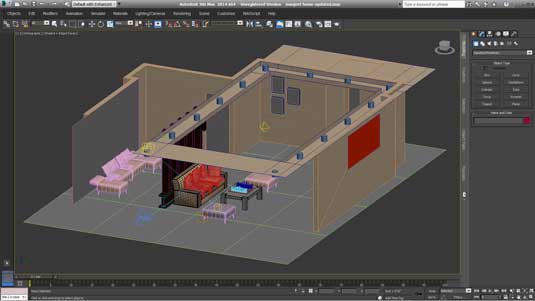
Modelling the room'south architecture is unremarkably not very hard, and can hands be done in 3ds Max without too much training or exercise. This is oft because room interiors are made upward of lots of straight and reasonably simple shapes.
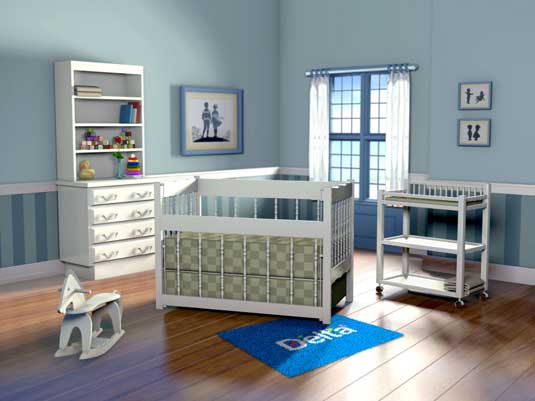
For example, in the 3D illustration at the tiptop of the page, we have a room that is a simple box. To it we added a slight setback expanse on the dorsum wall where the window is. And of course, nosotros added the window itself. All of this was rather simple work. And fifty-fifty most of the furniture in this scene is pretty elementary, containing mostly box-similar shapes with straight lines.
Things get more circuitous, though, when nosotros need to commencement populating the room with furniture and objects that make it all come up alive. 3DS Max has all of the tools one would demand to create such models, merely learning how to apply them, and in combination with ane another to create exotic shapes, begins to get more than complex.
The crib model in the centre gets a bit more complex, equally the trim along the elevation required an undulating wave shape (created using lofting and boolean tools), and the spindles have a circuitous profile (created using revolve contour tools). Other items in the scene are still more circuitous: the rocking horse, curtains, and toy duck were all created using a range of toolsets.
While learning to model objects in a program similar 3ds Max is no quick thing, at that place are shortcuts. One is to buy (or otherwise download for costless) models that can be used in Max, thus fugitive large amounts of fourth dimension spent modelling every item yourself.
Finding the freebies
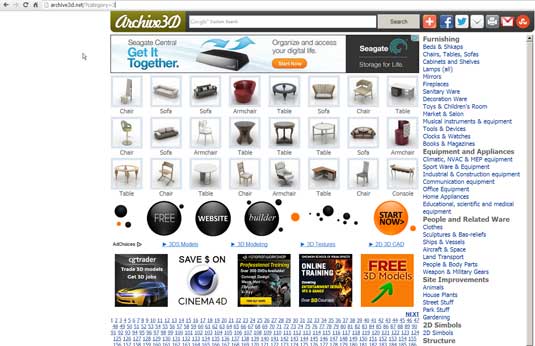
Many models that are advisable for interiors - from furniture and appliances, to doors and window dressings - can be found online and legitimately downloaded at niggling to no price. Free models oftentimes need some piece of work, and certainly need rescaling to fit your room dimensions.
Thousands of very loftier quality free models tin can be found at sites like www.archive3D.cyberspace. Another selection is to purchase model sets from places like turbosquid.com, and digimation.com.
Purchasing a model tends to ensure a flake more quality and ease of use, but not always. Y'all tin even buy completely finished room sets, all gear up up for yous and ready to render or animate, should a pre-fab suite your projection needs.

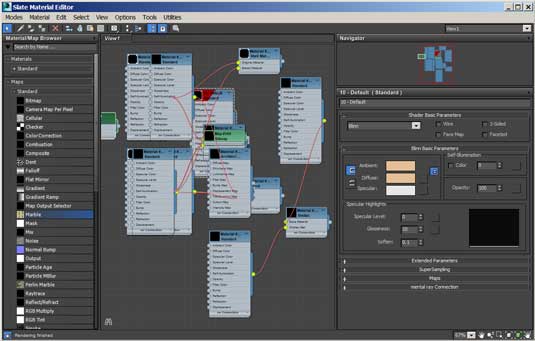
02. Scene building
The scene building stage is where nosotros take the raw models nosotros assembled, and turn them into a room. Offset this means we calibration and and put the models in place in the room. So we begin to texture them. This is done using one of two methods.
The standard way is to bring in pixel-based images (normally prepped in Photoshop), which are then practical or "mapped" to the models. For instance, an image with the texture of forest is applied to the flooring. This can be washed as a "planar" or flat project map, which is appropriate for a floor texture. For other model shapes, texture maps tin be applied in a cylinder or a sphere pattern.
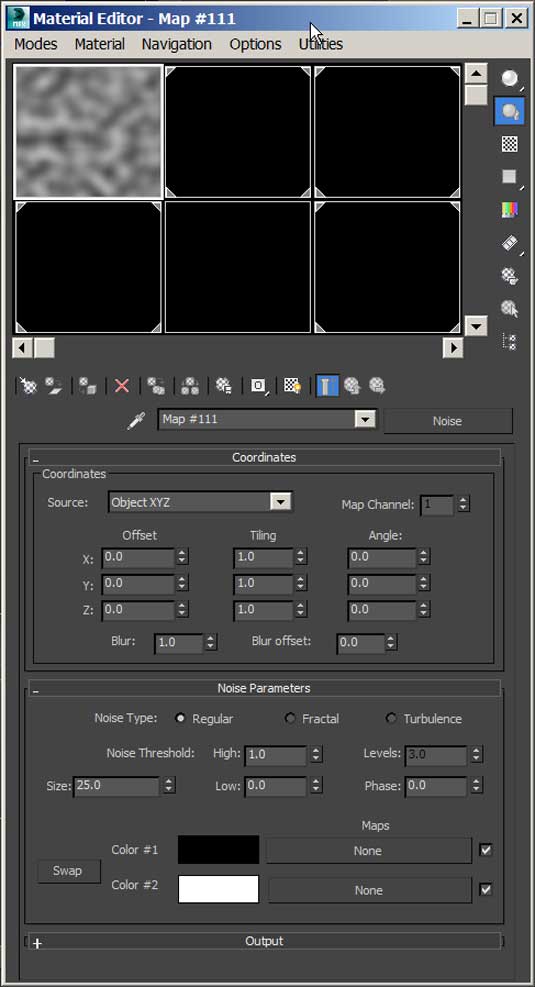
The other method of calculation texture is to apply "procedural" textures. These are patterns that are actually generated inside the software and tin can accept a broad range of modifying attributes that allow you to vary the prototype a swell bargain. These can also exist animated over time in ways pixel based images cannot be. Forest, marble, and other standard textures are included in Max, plus a whole lot more than.
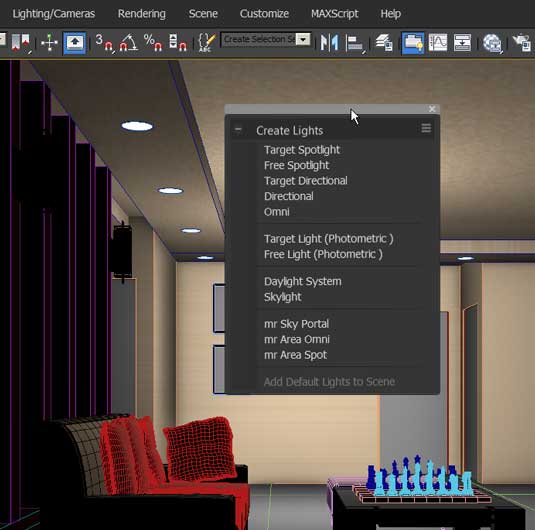
Lighting the room
The final major step to scene building is to light the room. If yous have a groundwork in photography, film lighting, stage lighting, or are an environmental lighting specialist, all the better. Max gives you lot lighting styles that replicate the types of lights nosotros piece of work with in the real world.
These include directional lighting (aka, the sun), betoken lights (bare bulb lighting that would usually have lampshades practical), tube lighting (flourescent), and others. Information technology also lets united states bring in IES lighting data, which helps to generate existent world lighting simulations, imperfections and all.
Lighting a scene is a fun experience. You tin can not only do virtually or all things yous could do in the real world, merely you tin can likewise practice the impossible equally well. For instance, y'all tin subtract lite from areas, and you tin can render multiple passes with dissimilar lighting, and make your terminal decisions by compositing the renders in Photoshop.
03. Rendering
The rendering process takes all of the decisions you made along the way and uses that information to create a final rendering of the file. The texturing, the lighting, the geometry datasets... all come together in that concluding rendering. Except for the fact that at that place is hardly e'er simply 1 rendering.
There is well-nigh e'er something that needs tweaking or didn't look quite right, so nosotros go back again to fix and re-return. If you lot are new to 3D, become used to this.
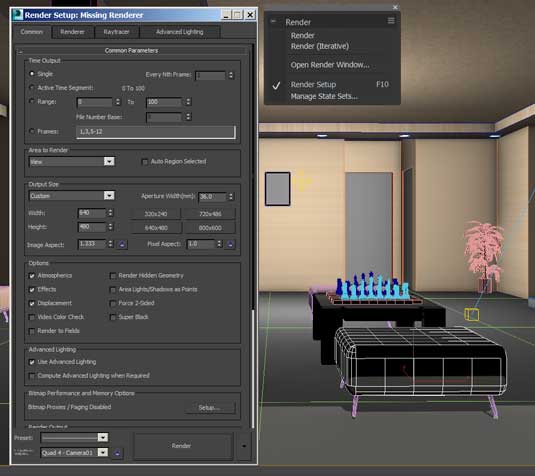
Part of what makes 3ds Max so popular with the architectural marketplace is that it offers many rendering options, like radiosity and mental ray engines. A 3rd party rendering engine called V-Ray is besides a very pop option and used a lot in architectural work.
04. Mail production
Allow'due south add together one more step here, because it is almost always needed. Post work. No matter how great you are, no matter what kind of 3D guru you have become, virtually all 3D piece of work goes into mail for tweaking. This tin hateful Photoshop for stills, or something similar Afterward Effects for animations. Fixing things in post is just faster and easier in nearly cases.
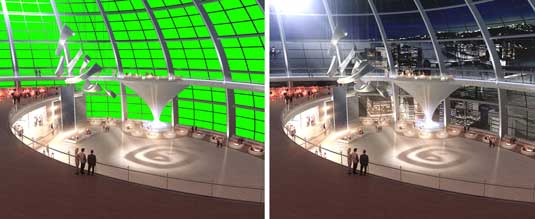
And as mentioned earlier, it is possible to render your scene in many passes and effectively offload much of the slow-moving decision procedure to post, where you can endeavor out variations much faster.
For instance, why not practise a separate render for each light in the scene (or groups of lights)? Stack the resulting images in Photoshop (commonly using the screen or lighten Blend Way), and interactively build upwardly your scene's lighting in post. This is particularly helpful in interior renderings that rely on the lighting to help make or break their success.
One final tip
Don't forget nigh depth of field when creating your interior masterpieces. Even if y'all want a abrupt image, having space DOF is a sure way to spot CG. Take the time to render out a depth map pass and employ it to bring more than realism to your shot.
Where to learn more
- Rendering in 3ds Max with Mental Ray
- 30+ Autodesk 3Ds Max Interior Blueprint Tutorials
- A good article on advanced lighting techniques
- Hands-on review: 3ds Max 2014
Resources for models
- TF3DM
- Turbosquid
- Digimation
Words: Lance Evans
Lance Evans is artistic director of Graphlink Media. He has written books on 3D, and produced the 3DNY Seminars for Apple and Alias.
Delivered in conjunction with ZED!
This content was produced in collaboration with HP & Intel as part of ZED - a Popular-Upwardly Studio for the Creative Community held in Soho, London. For more information about ZED and any future events see here.
Related manufactures
Source: https://www.creativebloq.com/audiovisual/how-render-interiors-3ds-max-10134733
0 Response to "Why Does Solids Appear in 3ds Max Revit Art Render"
Post a Comment